반응형
1. 목차 자동 링크 특징
- 우측에서 플로팅으로 따라다님
- 게시물 내 h2태그 기준 목차 자동으로 추출
- 목차 클릭 시 해당 목차에 해당하는 영역으로 자동 이동
- 게시물에서 수정하거나 삽입 할 필요 없이 javascript로 후처리 하여 간편한 사용
- 만드는데 3시간 정도 걸렸음. 이걸 자기가 만든 것 처럼 무단배포 하는 착한 사람이 있으면 내가 이런 꿀정보를 공유 못함.
2. 적용 방법

본인은 square 스킨을 사용 중, 다른 스킨을 사용하면 HTML 코드 구조가 다를 수 있으니 유의!

꾸미기 > 스킨 편집
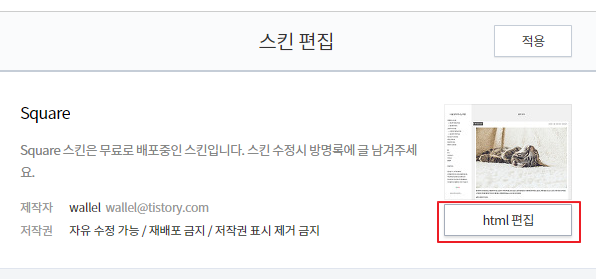
html 편집
이후 아래 3개의 코드를 적절한 위치에 추가해주면 된다.
이미지를 참고하여 위치를 확인 후 코드를 복사해서 넣어주자.

- HTML 코드(1)
<div id="floating-banner">
    <h3>목차</h3>
    <ul id="items">
    </ul>
</div>

- HTML 코드(2)
<script>
$(document).ready(function () {
	initFloatingBanner();
});

function initFloatingBanner()
{
	var tmp = parseInt($("#floating-banner").css('top'));

	$(window).scroll(function () {
			var scrollTop = $(window).scrollTop();
			var obj_position = scrollTop + tmp + "px";

			$("#floating-banner").stop().animate({
					"top": obj_position
			}, 500);

	}).scroll();

	document.querySelectorAll('#body.entry h2').forEach((element, index) => {
		console.log(element.innerText)
		if(!isStringOnlySpaces(element.innerText))
		{
			element.setAttribute('id', `h2_${index+1}`);
			addFloatingBannerItem(index+1, element.innerText)
		}
	});
}

function isStringOnlySpaces(str) {
  return /^\s*$/.test(str);
}

function addFloatingBannerItem(index, text) {
  const ul = document.getElementById("items");
  const li = document.createElement("li");
  const a = document.createElement("a");
  const linkText = document.createTextNode(text);

  a.setAttribute("href", `#h2_${index}`);
  a.appendChild(linkText);
  li.appendChild(a);
  ul.appendChild(li);
}

</script>

- CSS 코드
/*
	따라다니는 배너
*/
#floating-banner {
			position: absolute;
			width: 200px;
			right: -200px;
			border-radius: 5px;
			top: 250px;
			border: 3px solid #dddddd;
			padding: 5px;
			font-size: 150%;
			line-height: 1.2em;
	}

#floating-banner a {
			color: blue;
	}
반응형
'IT' 카테고리의 다른 글
| aws 람다 후기 - 가볍게는 ok, 실제 프로덕트에는 x (2) | 2023.04.03 |
|---|---|
| 근본있는 개발자를 향한 도전기 - 1 (1) | 2022.03.09 |
| 윈도우11 느려짐 현상 해결방법 (0) | 2022.01.04 |
| 구글 클라우드 스토리지 storage-service-account does not have storage.objects.create access to the Google Cloud Storage object. (0) | 2021.12.23 |
| 크롤링 http 302 요청 response 조회 (0) | 2021.10.08 |